
For those of you that have been following along for a while, you may recall my (Mallory’s) first home purchase back at the end of 2018. You can read about her experience purchasing my first home as a Realtor + tips here. In the almost 3 years since my husband, Kevin, and I have lived here, it has been our goal to renovate the kitchen in the 1942 home to something more functional and spacious.
We finally were able to do the renovation in October this year. We wanted to give you a resource of unexpected items, great contractors, and tips on how to help make a full renovation a little less stressful if you want to do any sort of remodeling to your home as well!

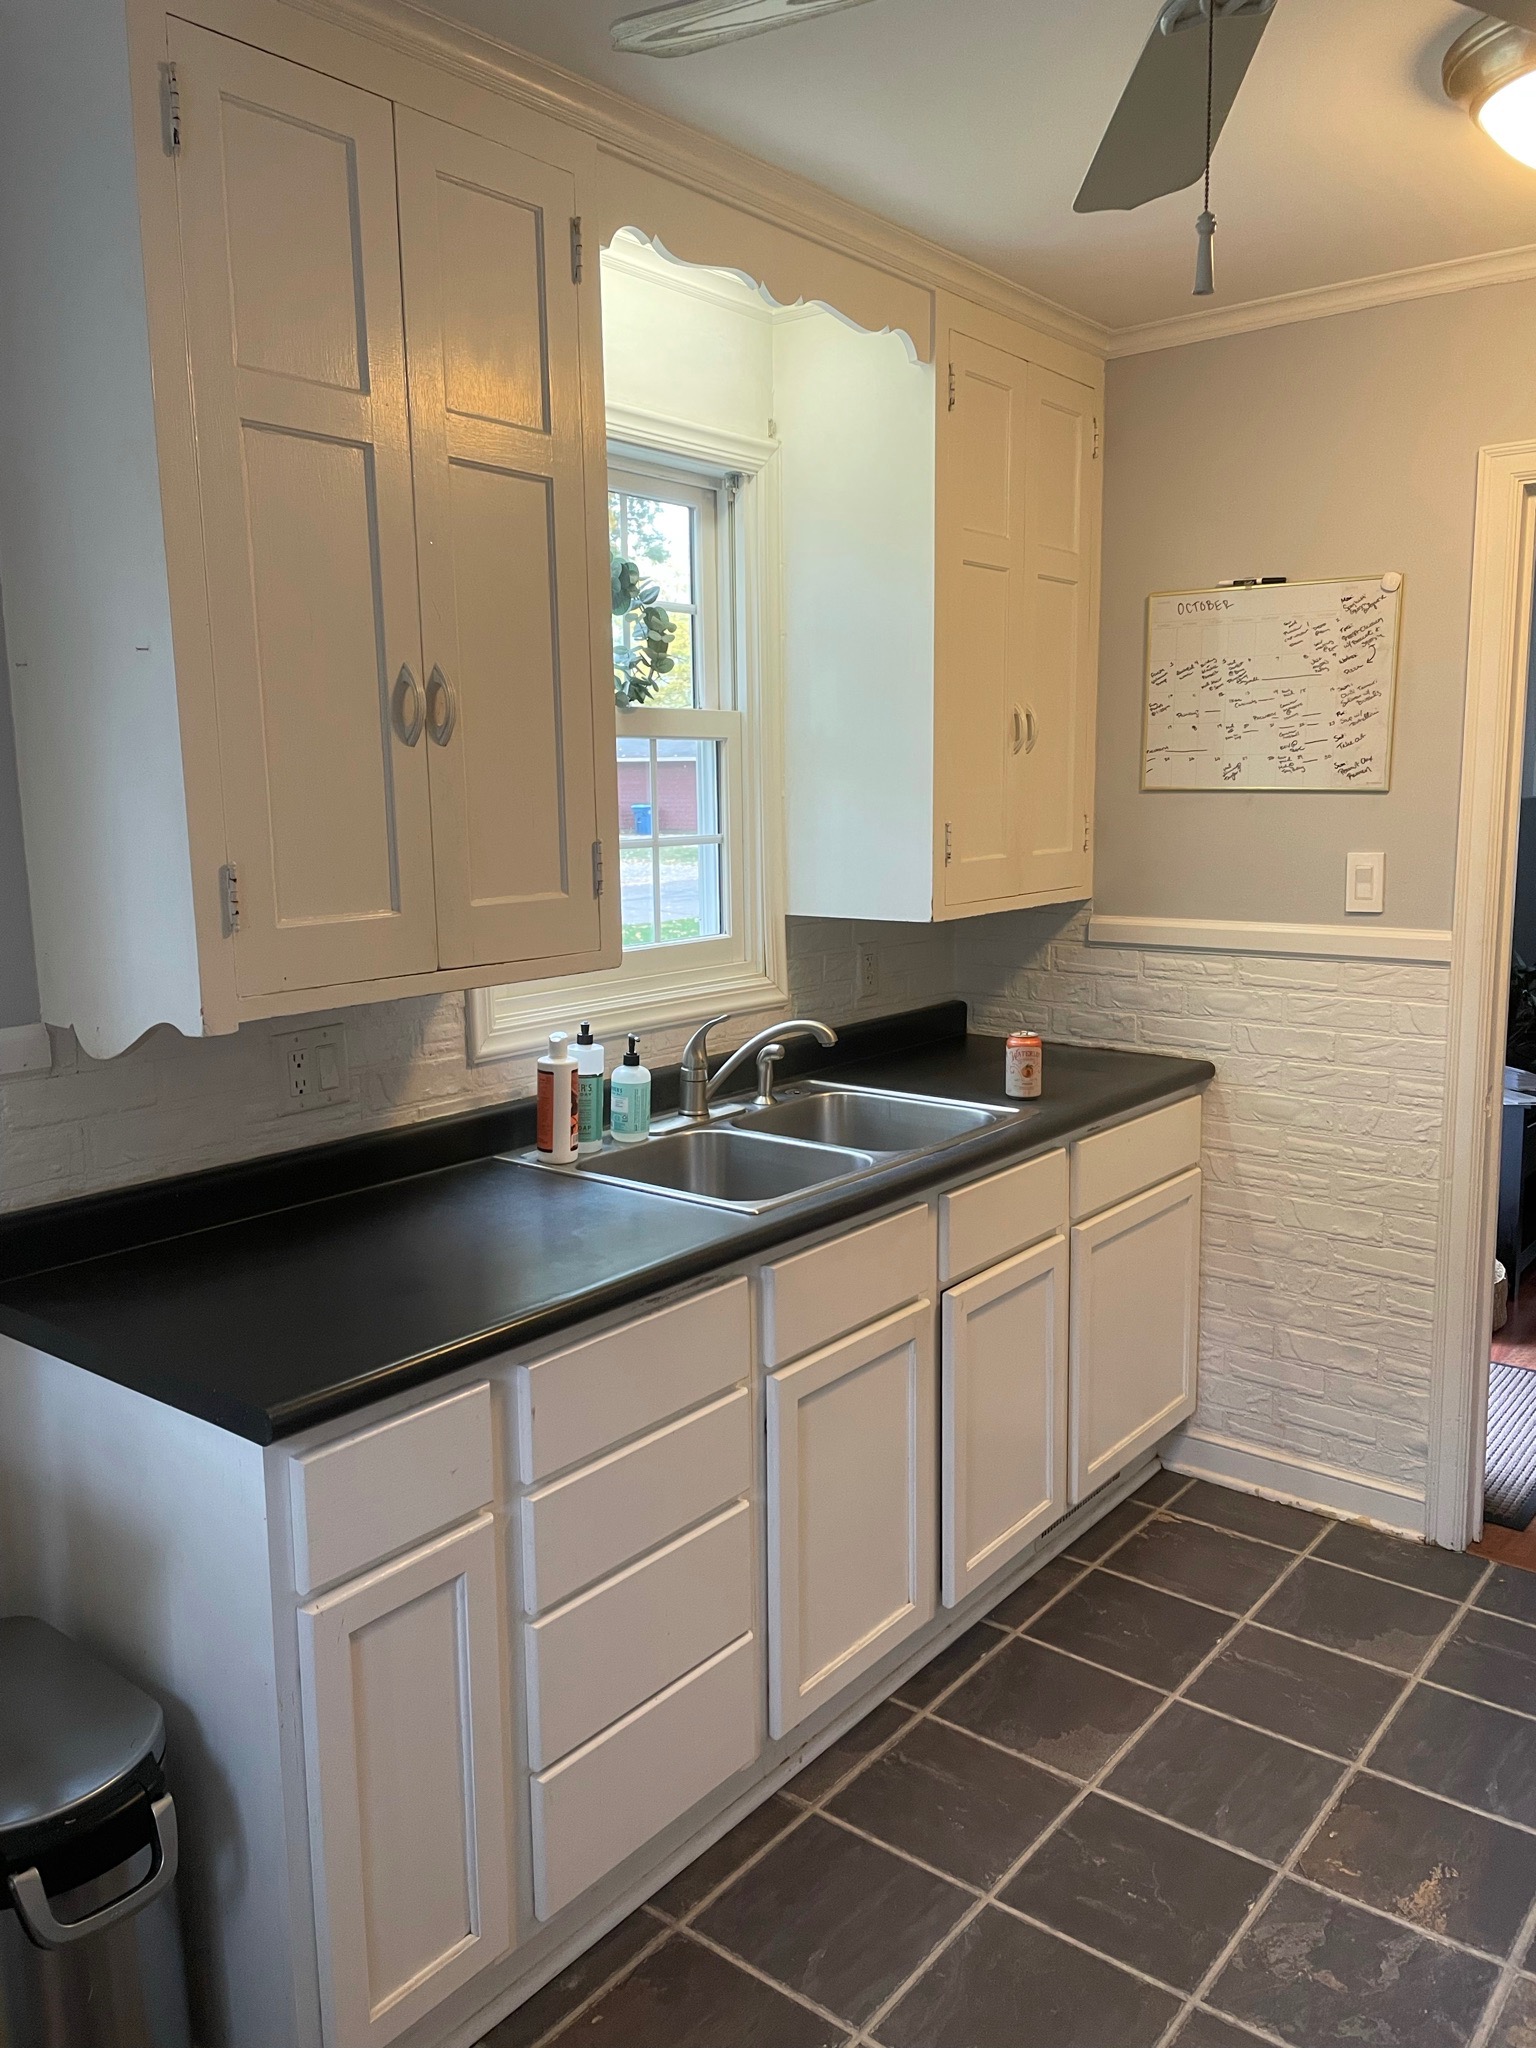

The Original Kitchen
As you can tell from the photos above, the counter & storage space in this kitchen was very limited. While the original cabinets were extremely charming, they had the appearance of being painted several times are were so long there wasn’t much room under the wall cabinets for storage on the counter. One big plus was the moveable counter that the sellers left for us. This ended up being a great storage space and prep area given the limited space on the other counters.
On the opposite side of the wall, there were no cabinets. There was a small closet, however, it was mostly used for extra cleaning supplies. The fridge was essentially in the middle of the wall and things were often kept on top of the fridge for extra storage. There was also a small metal storage cart in between the fridge & oven that was very useful.
There was also no dishwasher, garbage disposal, or oven vent in the kitchen.
The Planning – A few of Mal’s Key Tips
The planning for the kitchen was done several months in advance. If there is a tip that you take away for ANY remodel, it’s that you line up your contractors as soon as you can & well in advance. Make sure that you communicate any other contractor timelines to help prep the other contractors. Here are the items that were lined up by the end of July for an October renovation:
- Kitchen Design – We went through IKEA for their cabinets – they have a 25 year warranty on install! We had an employee through IKEA come do the measuring to ensure we had everything accurate for the design. We then made an appointment with an IKEA rep in store to design and plan the kitchen. This is a 2 hour appointment if you choose to go this route. We had a great experience designing the kitchen both with them making sure we got what we wanted, and them providing ideas to make it a better end result. We met with them in July for the design with the intention of doing it in the Fall to give us plenty of time.
- Cabinet install – IKEA cabinets and their installation company Traemead were used for the renovation. This was the first contractor that was officially booked, however, I also reached out to her preferred contractors to check they would be available around the install date to get everything ready.
- Wall Reconstruction/Repair Work – We did the demo ourselves, however, after putting new sheetrock in our basement, we knew we wanted a contractor to do the new walls, ceiling repair and paint. We reached out to our contractor, Dennis of Precision Handyman Services, to book him the week before install to come in and do all these items. Because we ended up having to take all the old walls down, he did 5 days of work for us. This included the window trim & crown moulding install as well.
- Electrical Work – This was one of the big ones to book well in advance – we had a previous estimate from when we did our basement so we already knew the cost. Make sure you reach out sooner than later for an estimate! Our electrician, DR Electric, needed to do their electrical work when all sheetrock was off and before new insulation went in so we scheduled them for the Monday after demolition. Don’t forget that you will need to have an electrical inspection and this also needs to be completed before any new insulation and sheetrock can go up.
- Plumbing – Our plumber, Eugene of Top Choice Plumbing, came a few times – 1st stop included turning off water lines the weekend before demo, 2nd stop included turning off the gas line to our stove and prepping the pipe for the sink, 3rd stop was after cabinets & countertops were in to reconnect water lines & gas line.
- Counter Install – We used Pacific Granite for our counters – we scheduled them to come measure for our Quartz tops the day after cabinet install was completed, 10/15, and they were able to come for install on 10/21. We had to pick out our slab about a month before install.
- New Flooring – We decided to go all out on our remodel and add new flooring for the main level into the mix. We met with our company, Hertaus Flooring, a month or so before the kitchen renovation to pick out the flooring we wanted but decided to wait to schedule until the rest of the kitchen was completed. One of our favorite things about the new floor is that it flows seamlessly from room to room.
The biggest thing is to try to reach out well in advance and shop around if you need to for estimates and to confirm timelines. All of our contractors were able to give us spot on estimates prior to install and came when we scheduled them. Make sure that when you’re getting your estimates that you are keeping track of all expenses so you have an idea of what your final total for your project will be.


The Demo
We did all our own demo work with the help of Mallory’s dad and step dad. The boys were able to knock it mostly out in a day. The clean up from this was one of the more time consuming aspects. My biggest tip here – if you have to do any demo, make sure to tarp items throughout the home, especially rooms/items closest to the demo area. This is a VERY messy process and even adding tarp over the doorways won’t keep the dust to the room. Plan to clean a lot during the demo process and during the first few steps of the reconstruction.
Additional note, if you suspect you have any mold/asbestos in your home, we recommend you have those items tested before you start the demo process.


Reconstruction & Cabinet Install
We had our handyman, Precision Handyman Services, handle the new walls for us. Because all the walls were torn and we needed some ceiling repair completed, it took our contractor 5 days to complete the work. This included all mudding & taping, painting the drywall and installing all new window & door trim + the crown moulding.


The reconstruction process was the most impressive part of the whole remodel. Every step was fun to watch unfold. Just having new walls up in the kitchen made the space feel so much bigger and fresh. Dennis did a wonderful job doing all the walls, paint, and trim work.
IKEA had their installer come for 2 days to have all cabinets done. When they arrive, they walk through the plan to make sure that everything is done to your specifications and any minor adjustments are approved. If you have specific questions about using IKEA for your kitchen, I am happy to help give a more detailed explanation of the process!
Once the countertops went in and the water was turned back on, the whole room really started to feel complete. When our electrical work was completed, they installed a pendant light over the sink and 3 LED flush lights to the ceiling. What was really the best part of the electrical being complete, however, was that we finally had a working dishwasher in our home!
Finishing Touches
New blinds – we installed new cordless faux wood blinds to all the windows in the kitchen to replace the old ones. We wanted to do a faux wood instead of a fabric to make them easier to clean. I highly recommend using Blinds.com if you’re looking for something practical and nice without breaking the bank!
Open shelving & butcher block bench – To keep the kitchen feeling open, we installed open shelving in-between the 2 windows. Our shelves were custom made and we had the company create a custom butcher block piece to match that we put on our window seat. They are Amish made and extremely sturdy! This was a little more of a splurge, however, we wanted to make sure we had something sturdy and well made since both pieces will be used frequently.
Flooring – Our new floors really are the icing on the cake! We chose to do a luxury vinyl plank that is extremely durable (a necessity with a large dog!). We went a lot lighter than the floors that were in the home originally, it has really made our home feel larger than it is! One big tip – we didn’t do doorway dividers in the floors. Letting them seamlessly flow from room to room really makes each space feel more connected, even though we have a Cape style home. This is a really small piece, but it makes a very big difference!
“Unexpected” Expenses & Hiccups
This is can vary by project quite dramatically, however, here are a few you may run into depending on the scope of your project
- New trim/baseboard/Crown Moulding – because we ended up having to rip out all of the old walls, we had to purchase all new baseboard & window/door trim. I was also hopeful the original crown moulding could be saved, but it was too fragile.
- New insulation – the existing insulation was a combination of old newspapers, (very common for old home!) there were some from 1941 and featured items from WWII, and newer blown in fiberglass from when the siding was replaced.
- Waste Disposal – we used Bagster and while the bags were only about $30 a piece, the pick up for the 2 bags ended up being a little over $300.
- Building Permit – we were hopeful we wouldn’t need a building permit since we weren’t changing the structure of the room, however, because we opened up 2 exterior walls we had to pull a building permit. This price varies per city, make sure to check your city code guidelines when doing a project like this to see what is required.
Our hiccups were relatively minor – thank goodness! Here are a few that we experienced:
The reconstruction of the new drywall and mudding/taping took longer than expected. We had been hopeful we wouldn’t have to tear out the whole room so had only planned on 3 days for reconstruction with our handyman. However, it ended up being 5 days of work for him because the job was bigger than planned. We were extremely lucky that he was able to still keep this in his schedule. Because of this, I would highly recommend that you give a few days of cushion for wall prep/reconstruction before you have any installers scheduled if you do a complete remodel like this.
Our brand new faucet had a leaky water line when it was installed so I had to run out and get a new one last minute (that cost almost double the original).
I also purchased floating shelves for the kitchen, however, failed to confirm stud locations and new shelves had to be ordered for the room. With custom placements and a custom piece for the window seat that was ordered, they ended up not arriving until late November even though the other work was completed by Oct. 25th.
Finally, our electrician was very busy so they had to come a week later than anticipated to set up lighting/outlets. Had we confirmed those dates further in advance, this likely wouldn’t have happened. This was one of those that confirmed that these contractors are indeed crazy busy and the sooner you can book them, the better chance you have for a timely process.
Some of our Favorite Touches
- Soft close cabinets & drawers
- Pull out drawers in the pantry for easy access of all products
- The window seat doubles as a pull out drawer for extra storage
- Large drawers for pots & pans next to the stove
- Deep single bowl sink with drying rack
- Under cabinet lighting by the stove is great for cooking in the evenings


The End Result
Our new floors went in the middle of December. We had the entire main level done with the same flooring. And with that, we had a fully renovated kitchen!
We do plan to add a backsplash in the semi-near future, however, for the time being we are enjoying the kitchen as is. After almost 3 years in our original kitchen, it feels extremely satisfying to have created a space that we love and that we know will be functional for the people that follow us. If you have any specific questions about the process or need guidance on what we recommend, please do not hesitate to reach out!
You can connect with us on our website – RJandCoHomes.com or Instagram at @RochelleJohnsonandCo
